Setting up a Python website with Ajenti V (Django example)
In this tutorial we will set up a Python website with Ajenti V, using a test Django project as example.
Prerequisites: Ajenti V (NGINX, Python-WSGI packages)
(Optional) creating a Django project
1. Create an empty project and DB
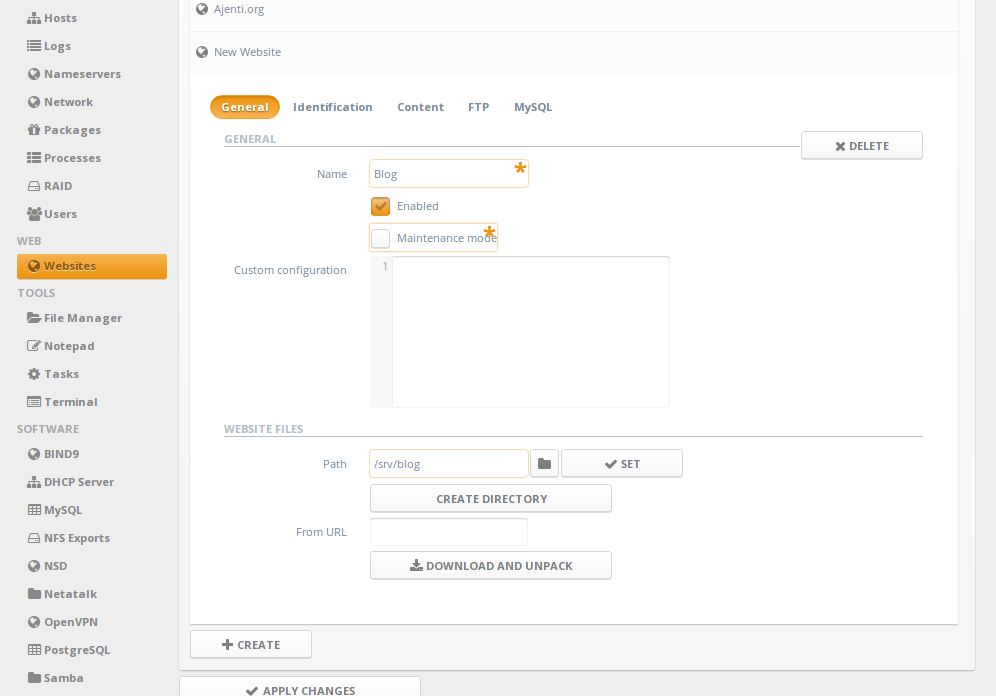
1. Navigate to Ajenti panel, and open Websites section. Click Create button, and expand newly created New Website entry.
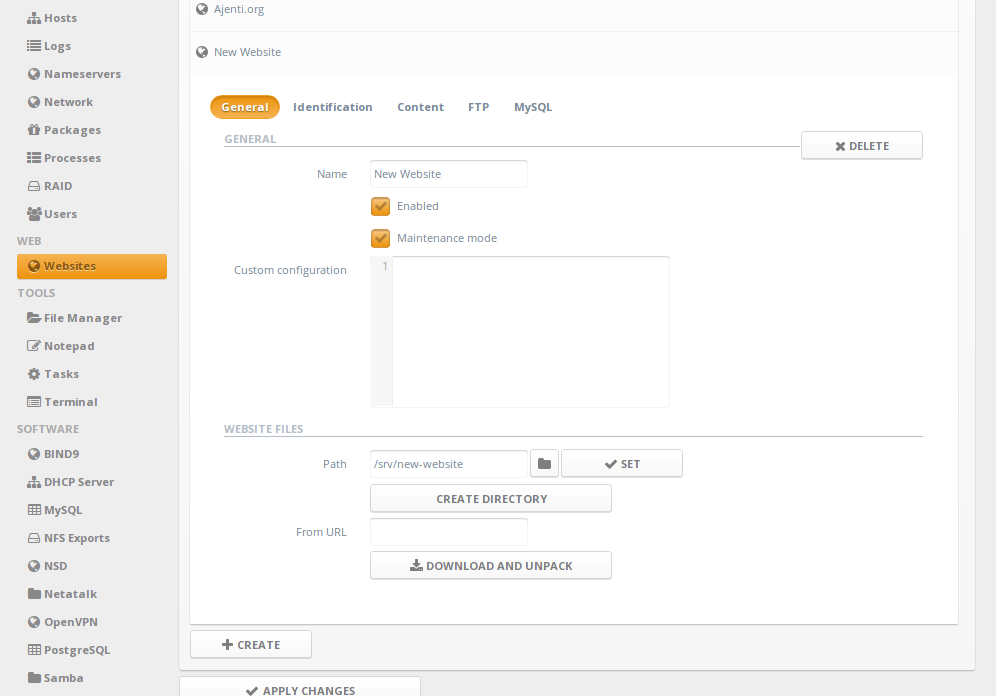
2. Uncheck Maintenance mode checkbox, and Path to your website's path.
3. Under Identification page, Create and set a domain entry.

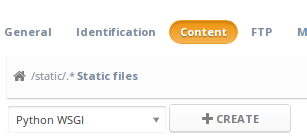
4. Under Content page, Create a new content entry of type Python.
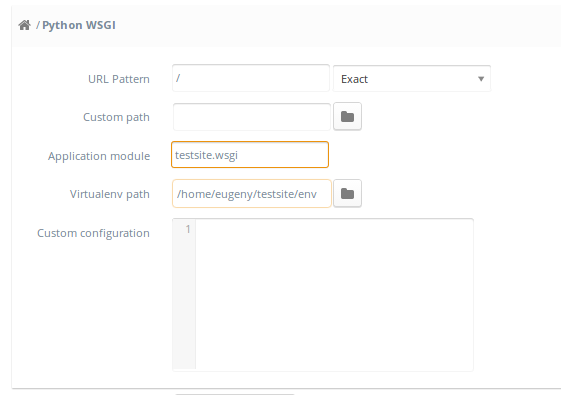
Set the Virtualenv path (/env) and Django-generated WSGI module name (testsite.wsgi)
4. Optionally, create an additional Static Files entry for Django's static files

5. Click Apply changes
6. Done! Now navigate to http://domain/.
Prerequisites: Ajenti V (NGINX, Python-WSGI packages)
(Optional) creating a Django project
1. Create an empty project and DB
$ django-admin.py startproject testsite
$ cd testsite
$ ./manage.py syncdb
$ echo 'STATIC_ROOT="public/static"' >> testsite/settings.py
$ mkdir -p public/static
$ ./manage.py collectstatic
2. Create virtualenv
$ virtualenv env
$ source env/bin/activate
$ pip install Django gunicorn
Setting up Ajenti V
1. Navigate to Ajenti panel, and open Websites section. Click Create button, and expand newly created New Website entry.
2. Uncheck Maintenance mode checkbox, and Path to your website's path.
3. Under Identification page, Create and set a domain entry.
4. Under Content page, Create a new content entry of type Python.
Set the Virtualenv path (/env) and Django-generated WSGI module name (testsite.wsgi)
4. Optionally, create an additional Static Files entry for Django's static files
5. Click Apply changes
6. Done! Now navigate to http://domain/.
Customer support service by UserEcho
