Deploying to Ajenti V with Jenkins CI
In this tutorial, we'll be deploying a Django + Node.js app bundle to Ajenti V using Jenkins continuous integration server.
Apply changes, and run
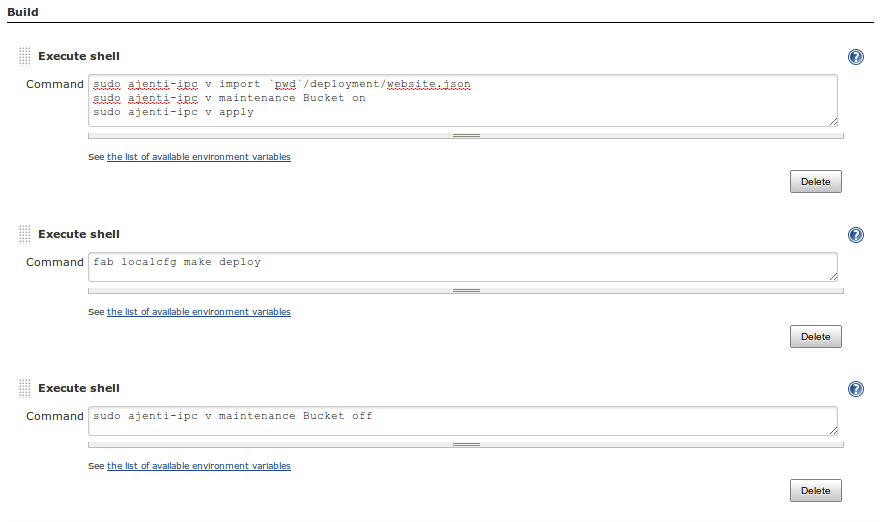
Add following Shell Script before actual deployment:
Add following Shell Script after actual deployment:
Save and run the job.
Prerequisites
- Prepare some means for general deployment automation - in this example we use Fabric and this fabfile.
jenkinsuser must haveNOPASSWDsudo access (for security, limit this tojenkins ALL:NOPASSWD /usr/bin/ajenti-ipc*).
Ajenti V setup
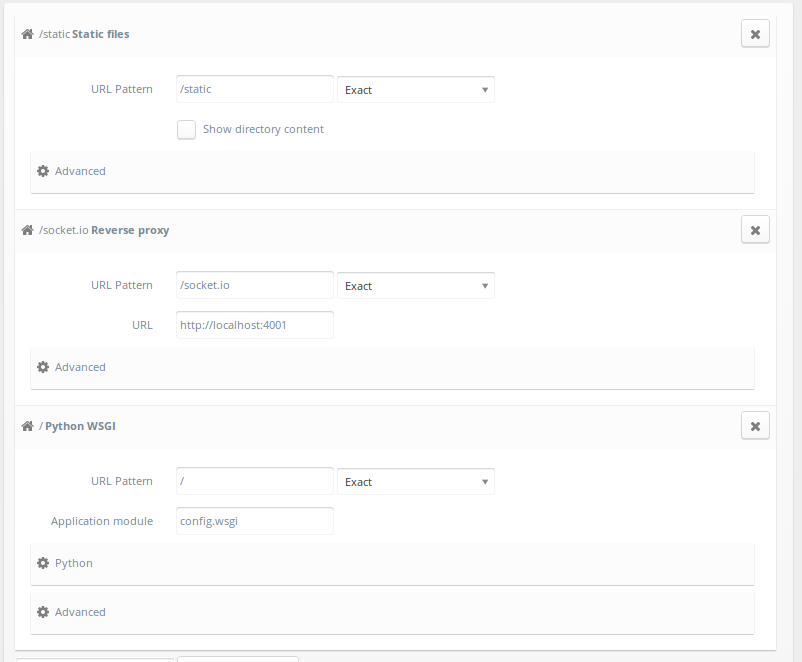
Set up website config in Ajenti V. In this tutorial we use following content config:Apply changes, and run
ajenti-ipc v export <website name>, in this example:
root@j77268:~# ajenti-ipc v export Bucket
{
    "name": "Bucket",
    "maintenance_mode": false,
    "ssl_key_path": "/srv/bucket/deployment/production.key",
    "locations": [
        {
....
Copy this JSON config, and save it in your project under
deployment/website.json
Job setup
Create a freestyle Jenkins job, set up project location, etc, etc, etc and continue to Build section.Add following Shell Script before actual deployment:
sudo ajenti-ipc v import `pwd`/deployment/website.json
sudo ajenti-ipc v maintenance <website name> on
sudo ajenti-ipc v apply
Add following Shell Script after actual deployment:
sudo ajenti-ipc v maintenance <website name> off
Save and run the job.
Customer support service by UserEcho
